What I Learned from Building NTUMods.org
NTUMods.org started as a passion project to improve the course planning experience for NTU students. The existing systems offered by the university are often unintuitive, slow, and frustrating to use. Simple actions — like toggling between class indexes — require reloading the entire page, and there’s no built-in support to export your timetable to calendar apps. For many students, the process of planning a semester feels clunky and inefficient, especially during the already stressful course registration period.
We wanted to fix that by building a platform that puts the student experience first. One where users can seamlessly toggle alternative classes, visualize potential clashes instantly, share plans, and prepare for the semester more confidently.
Of course, building NTUMods wasn’t without its own set of challenges. NTU does not provide structured, developer-friendly access to course data.
Historically, several similar student-led projects attempted to solve this issue in the past, but none of them became a tool that was widely-used by NTU students.
Fortunately, some of my friends at NTUSU (NTU Student Union) Tech shared the same frustrations and passion for solving them, and together we decided to bring this idea to life.
NB: We’d like to acknowledge that, in designing NTUMods, we also drew inspiration from NUSMods, whose thoughtful plaform has long made it a go-to tool for NUS students.
Starting Simple: A Better Timetable Planner
We began by focusing on just one thing: the timetable.
Our early version didn’t have many features, but it had a clean and intuitive UI — including:
- Toggleable alternative class slots directly in the timetable
- Shareable links to plans
- .ics file export to add schedules to calendar apps
- An interactive tutorial to guide first-time users
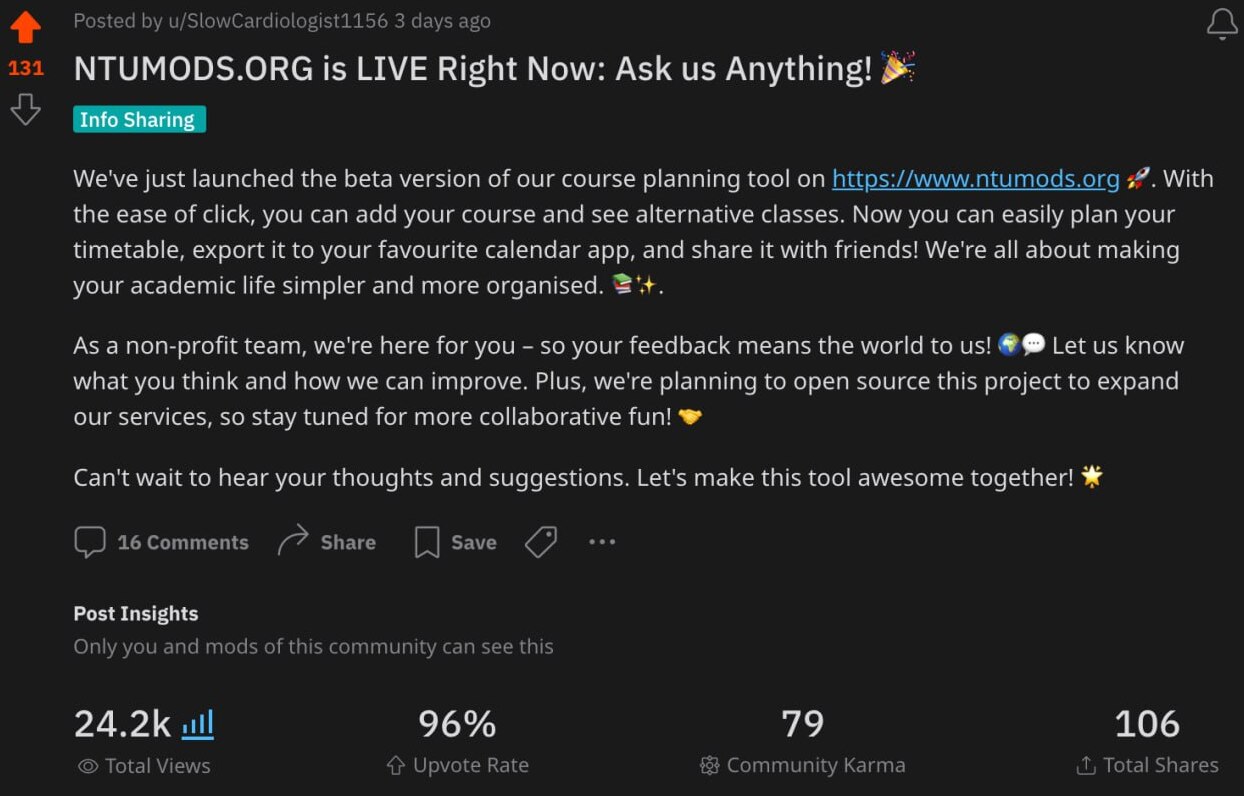
We posted our launch on Reddit, and also ran a small promotion via the NTUSU Instagram page. We received strong engagement — with over 4.2k unique visitors and 16.8k page views in the first month. The comments and feedback were overwhelmingly positive.
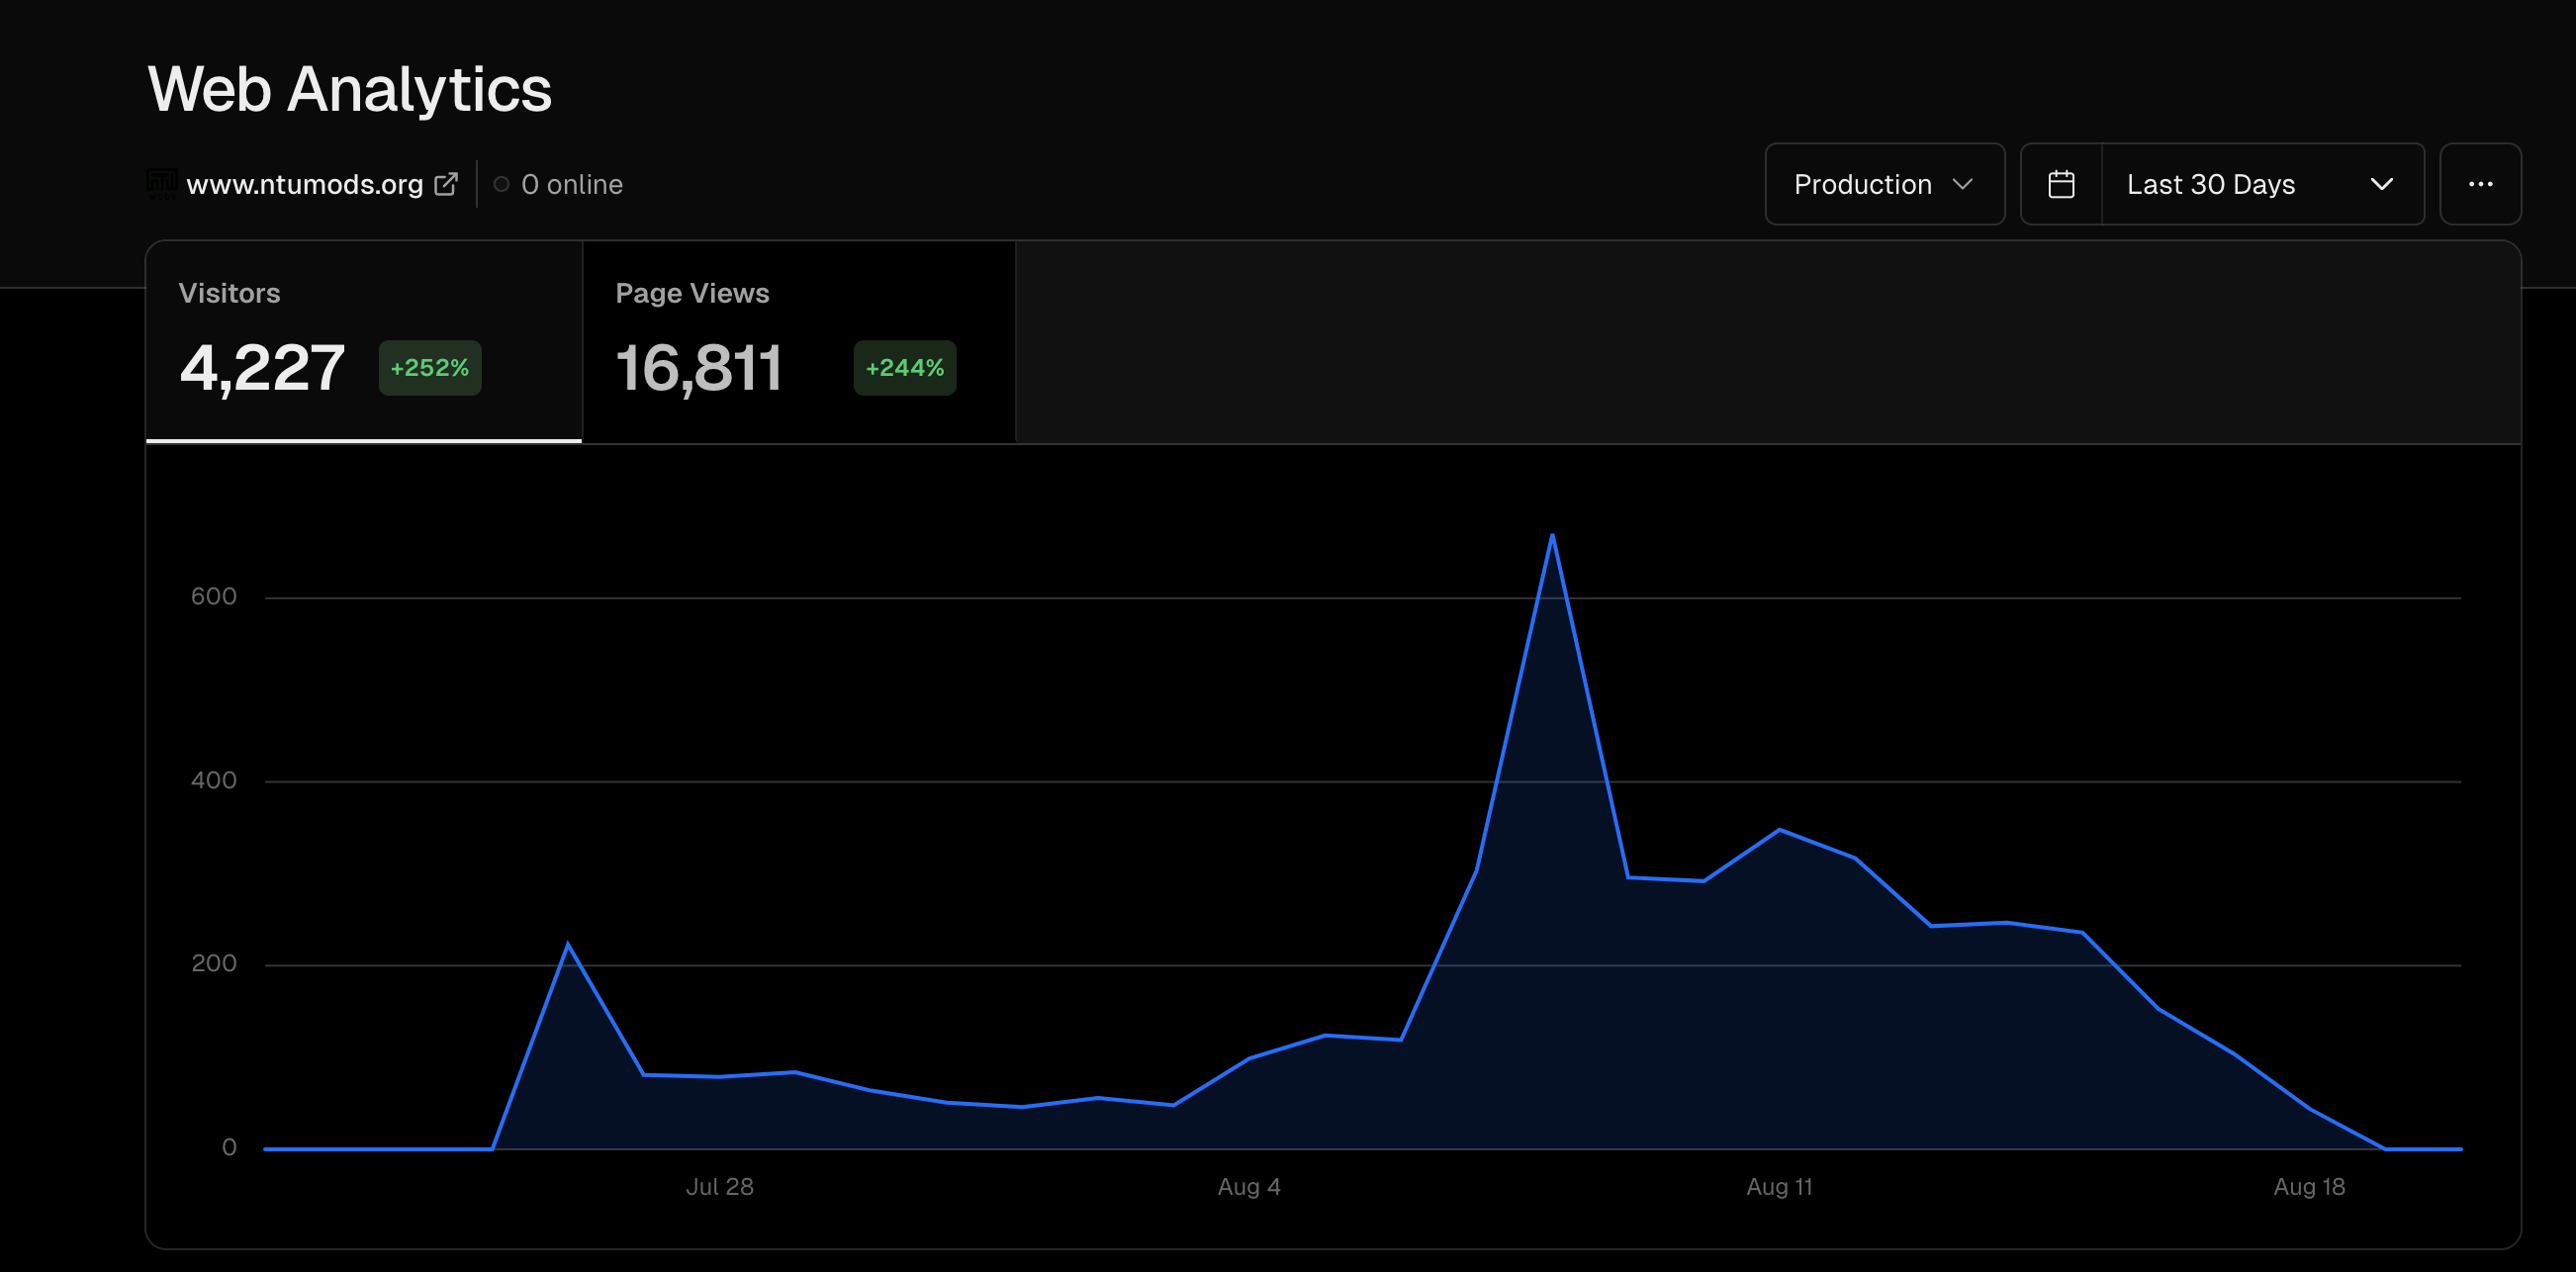
All of this thanks to this Reddit post!
However, that initial spike didn’t translate into long-term user retention. Aside from (admittedly) close friends who continued to use it regularly, most traffic faded after the first few weeks.
Expanding Scope: Course Reviews (and Mistakes Made)
We then introduced a course review feature using Disqus as a quick solution for adding comments.
We promoted the update again through NTUSU — and unsurprisingly, it didn’t gain much traction. Only a handful of users submitted reviews. I also tried advocating for it on Reddit, but was told that platforms like ours must be published through official student union channels, which limited our ability to reach more students directly.
Publishing the update on LinkedIn did help raise awareness and brought in some encouraging responses, but like before, it didn’t translate to long-term user retention. It turns out, is a much harder problem to solve.
Worse, Disqus later began showing inappropriate ads. At thes time of writing, we’ve started developing our own in-house commenting system — a lesson learned on not relying too heavily on third-party platforms, especially for content moderation and UX-critical features.
Future Plans
NTUMods was originally developed in early 2024 — before LLMs became as capable and accessible as they are today. Looking ahead, we see strong potential in adding other features, including AI-powered features to help students plan smarter, such as intelligent timetable suggestions, clash-free index recommendations, or even course combination insights based on learning styles and past reviews.
Of course, building everything at once isn’t realistic. As a small team within the NTUSU Tech Committee, we’ve had to prioritize core stability and UI improvements over more advanced features. Much of our current bandwidth is also focused on supporting other internal platforms for NTUSU services.
That’s why we’re planning to open-source NTUMods. While I’m personally still new to the open-source world, we believe it’s the right step forward to make the project more sustainable, collaborative, and inclusive. If you have experience contributing to or maintaining open-source projects — and the bandwidth to help — we’d love to learn from you and work together. Whether it’s development, design, or just guidance, every contribution helps shape a better platform for the NTU community.
Next, we’re going to talk about the technical details. This part will be updated incrementally as it will be difficult to cover everything.
Technical Deep Dive
Back End
NOTEAs for the backend, most of it revolves around standard CRUD operations and API integration. I won’t dive deep here, as I wasn’t directly involved in that part — credit goes to @michac789 and the backend team for building everything from scratch and keeping it reliable. I will only talk about how we obtain NTU’s course detail & schedule and exam data.
Scraper
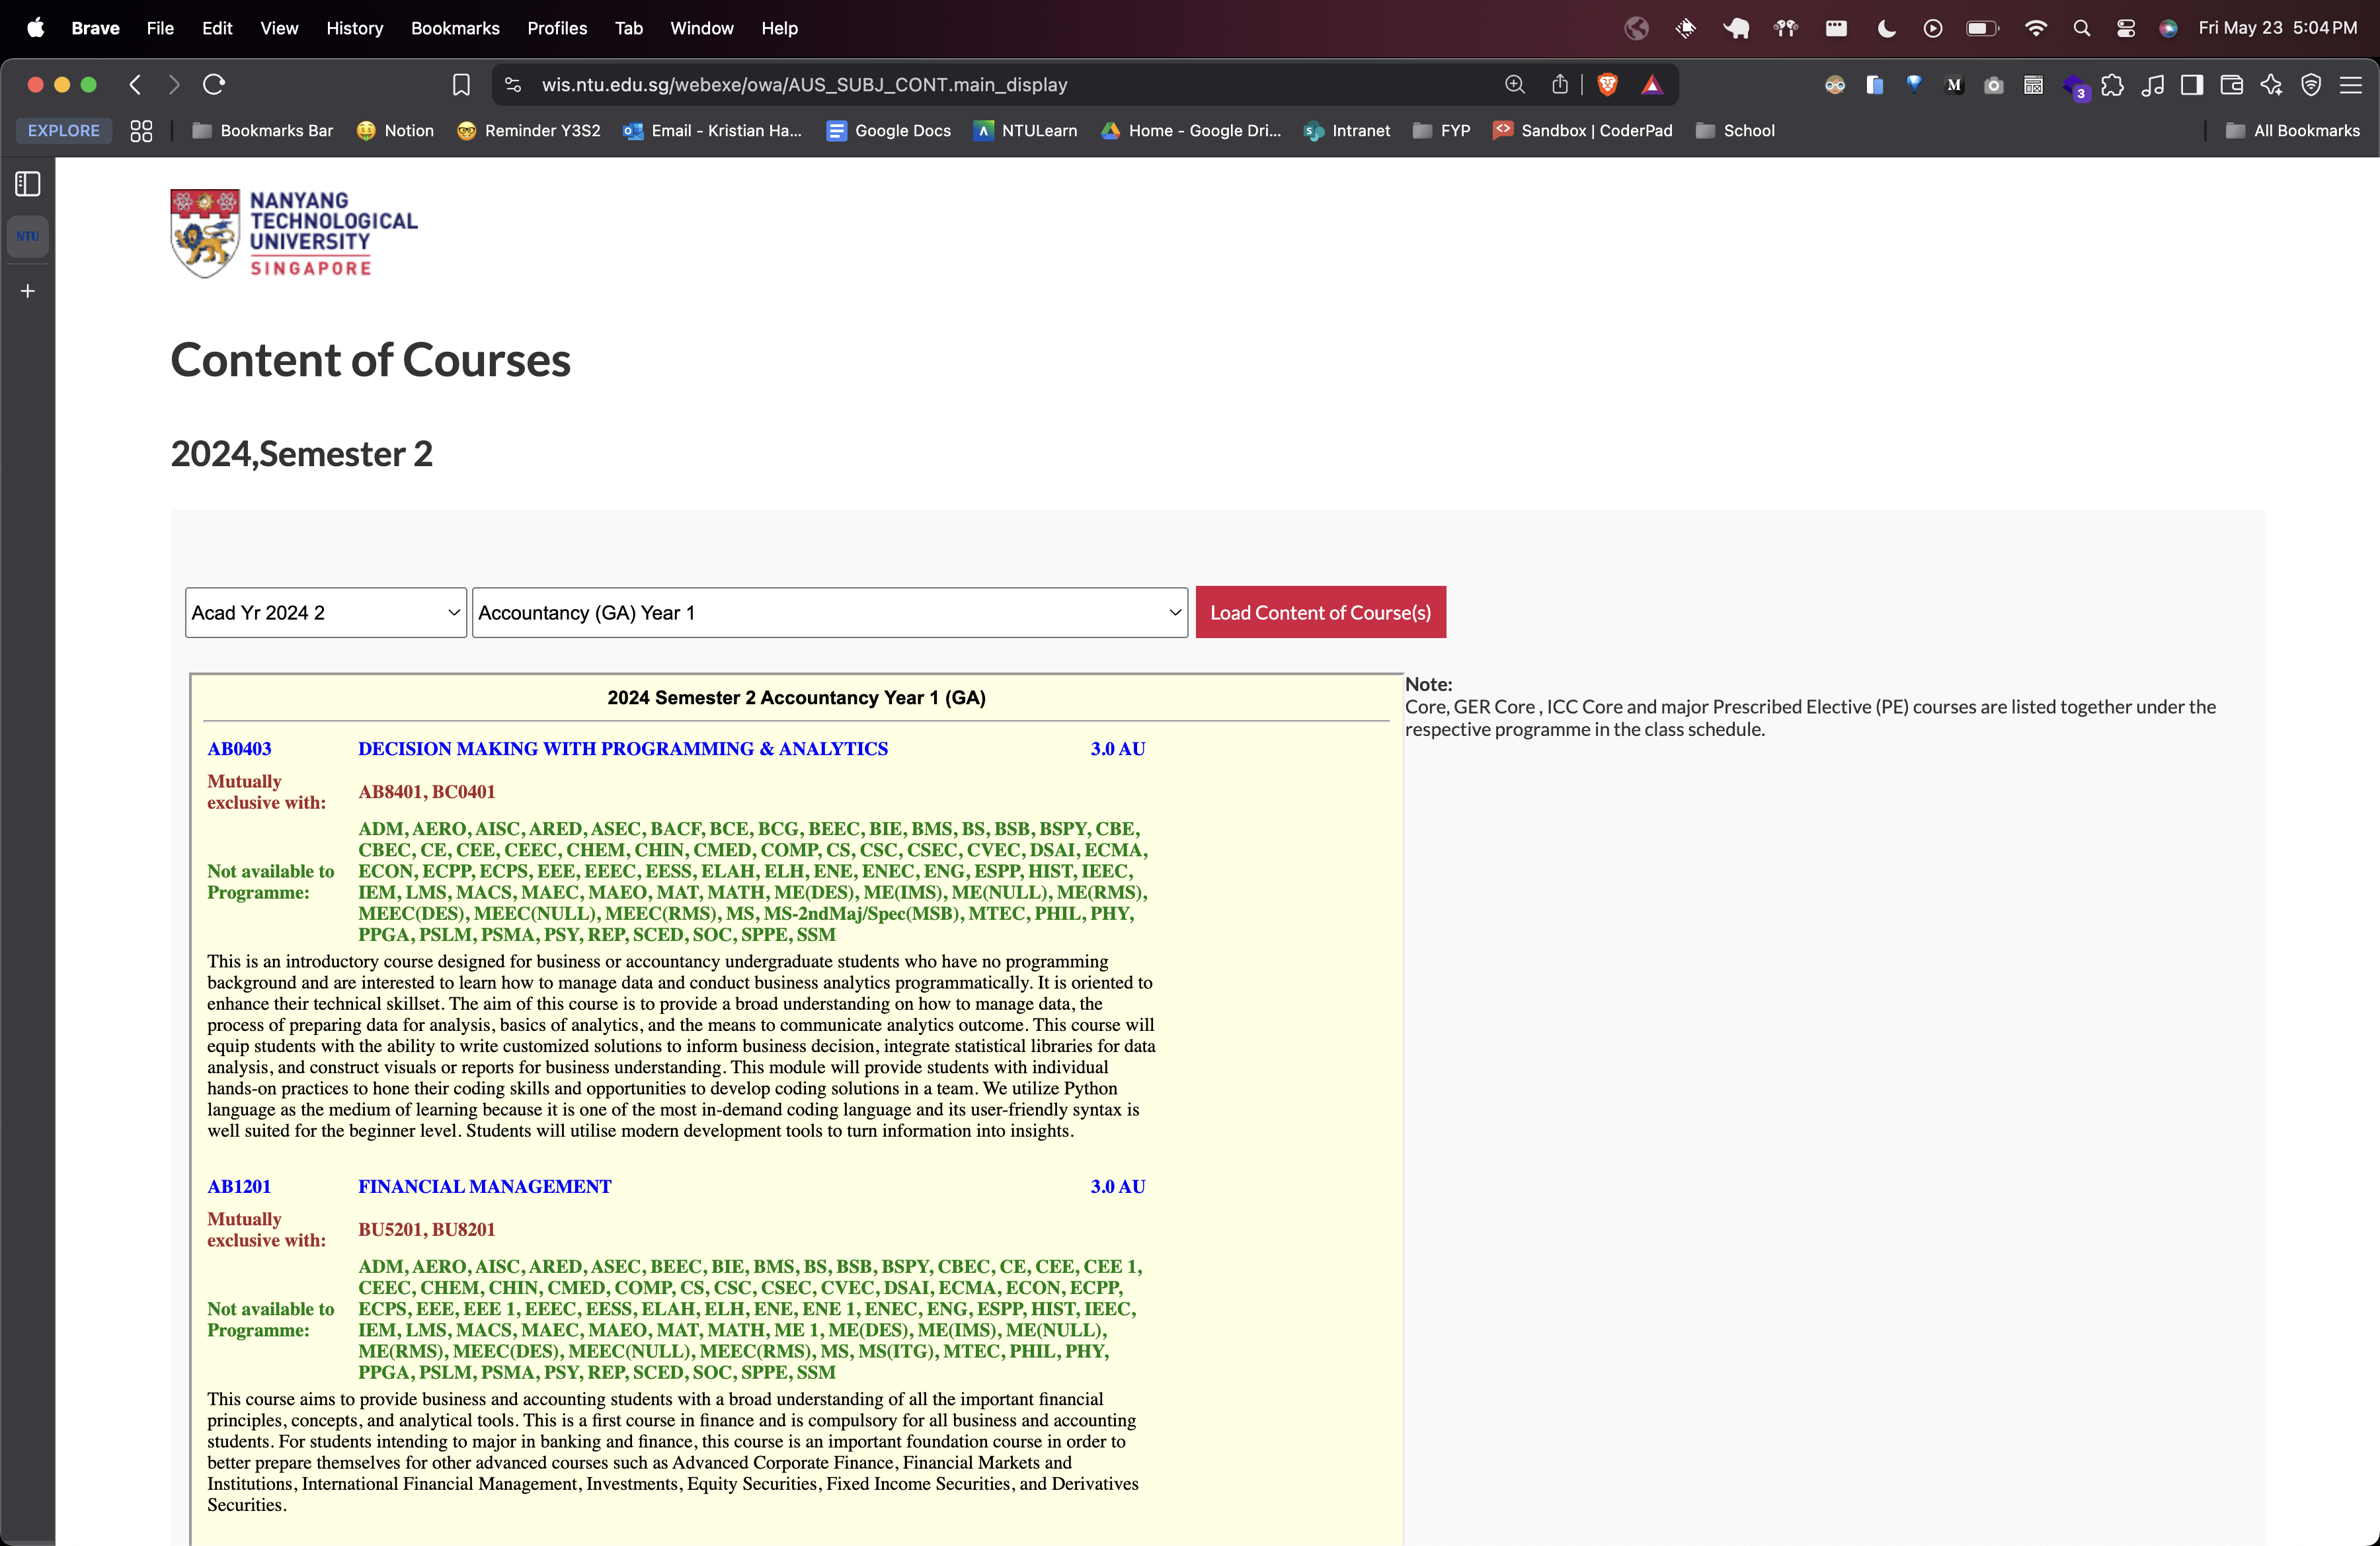
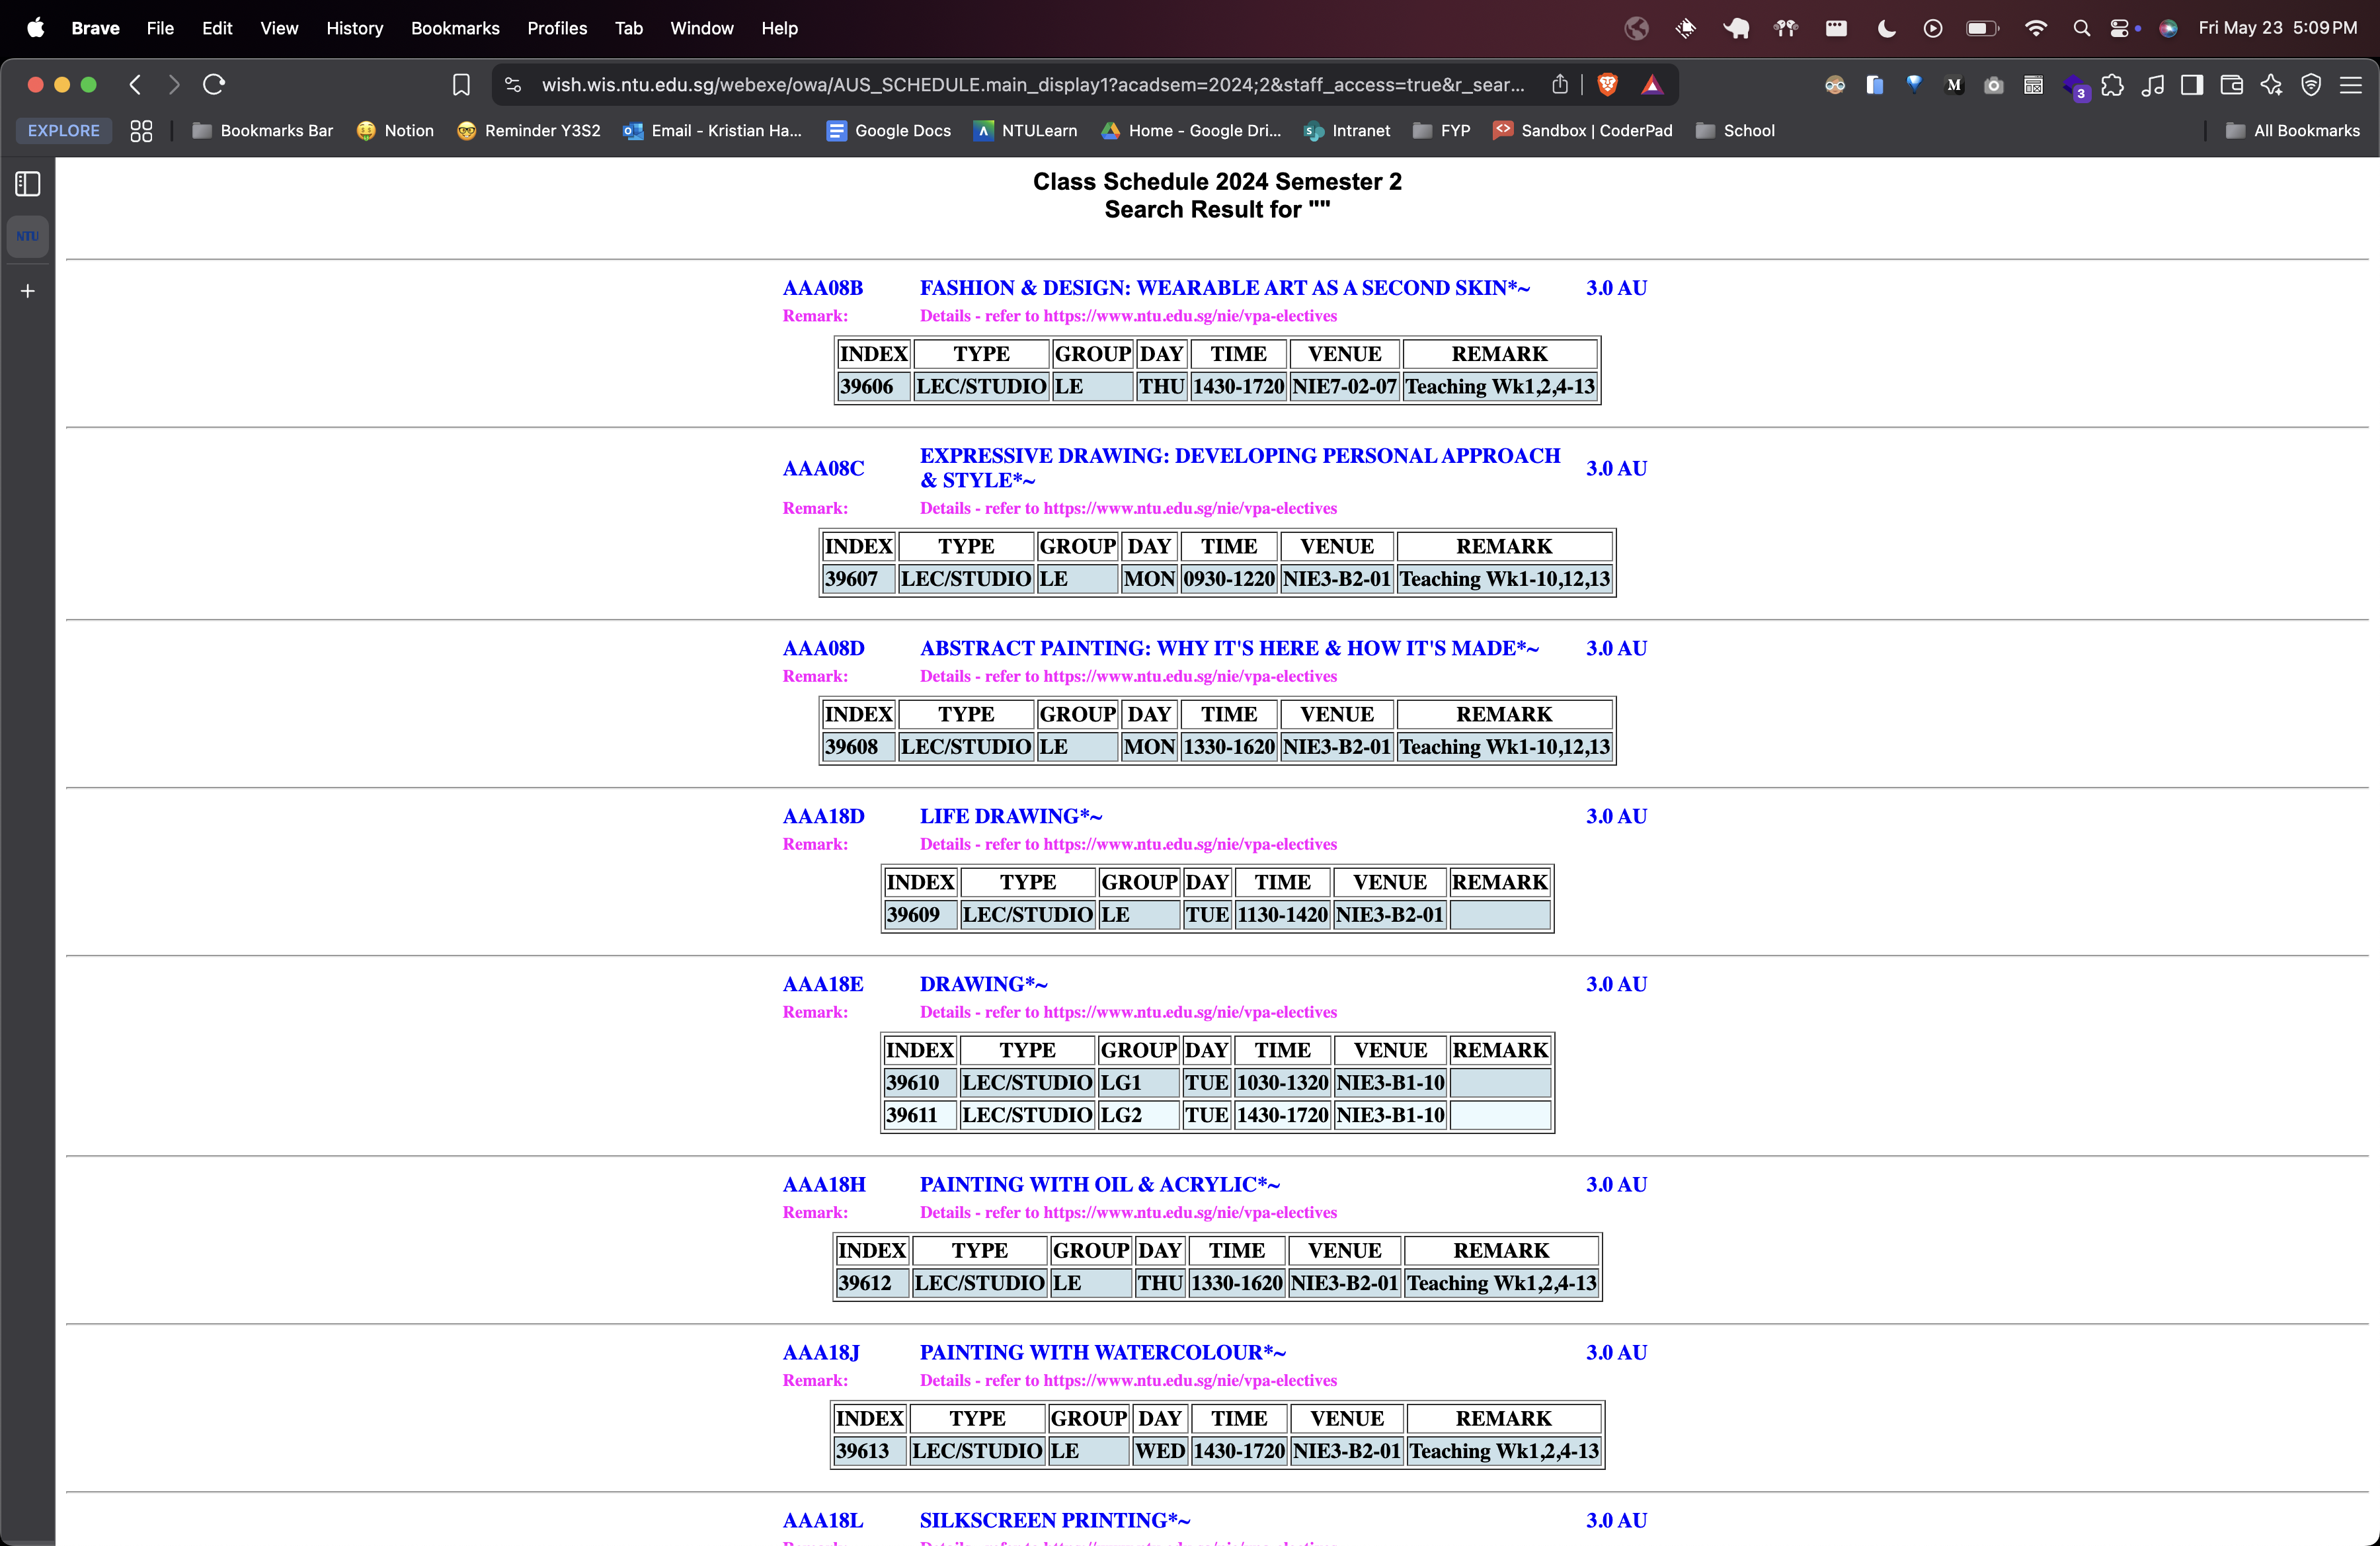
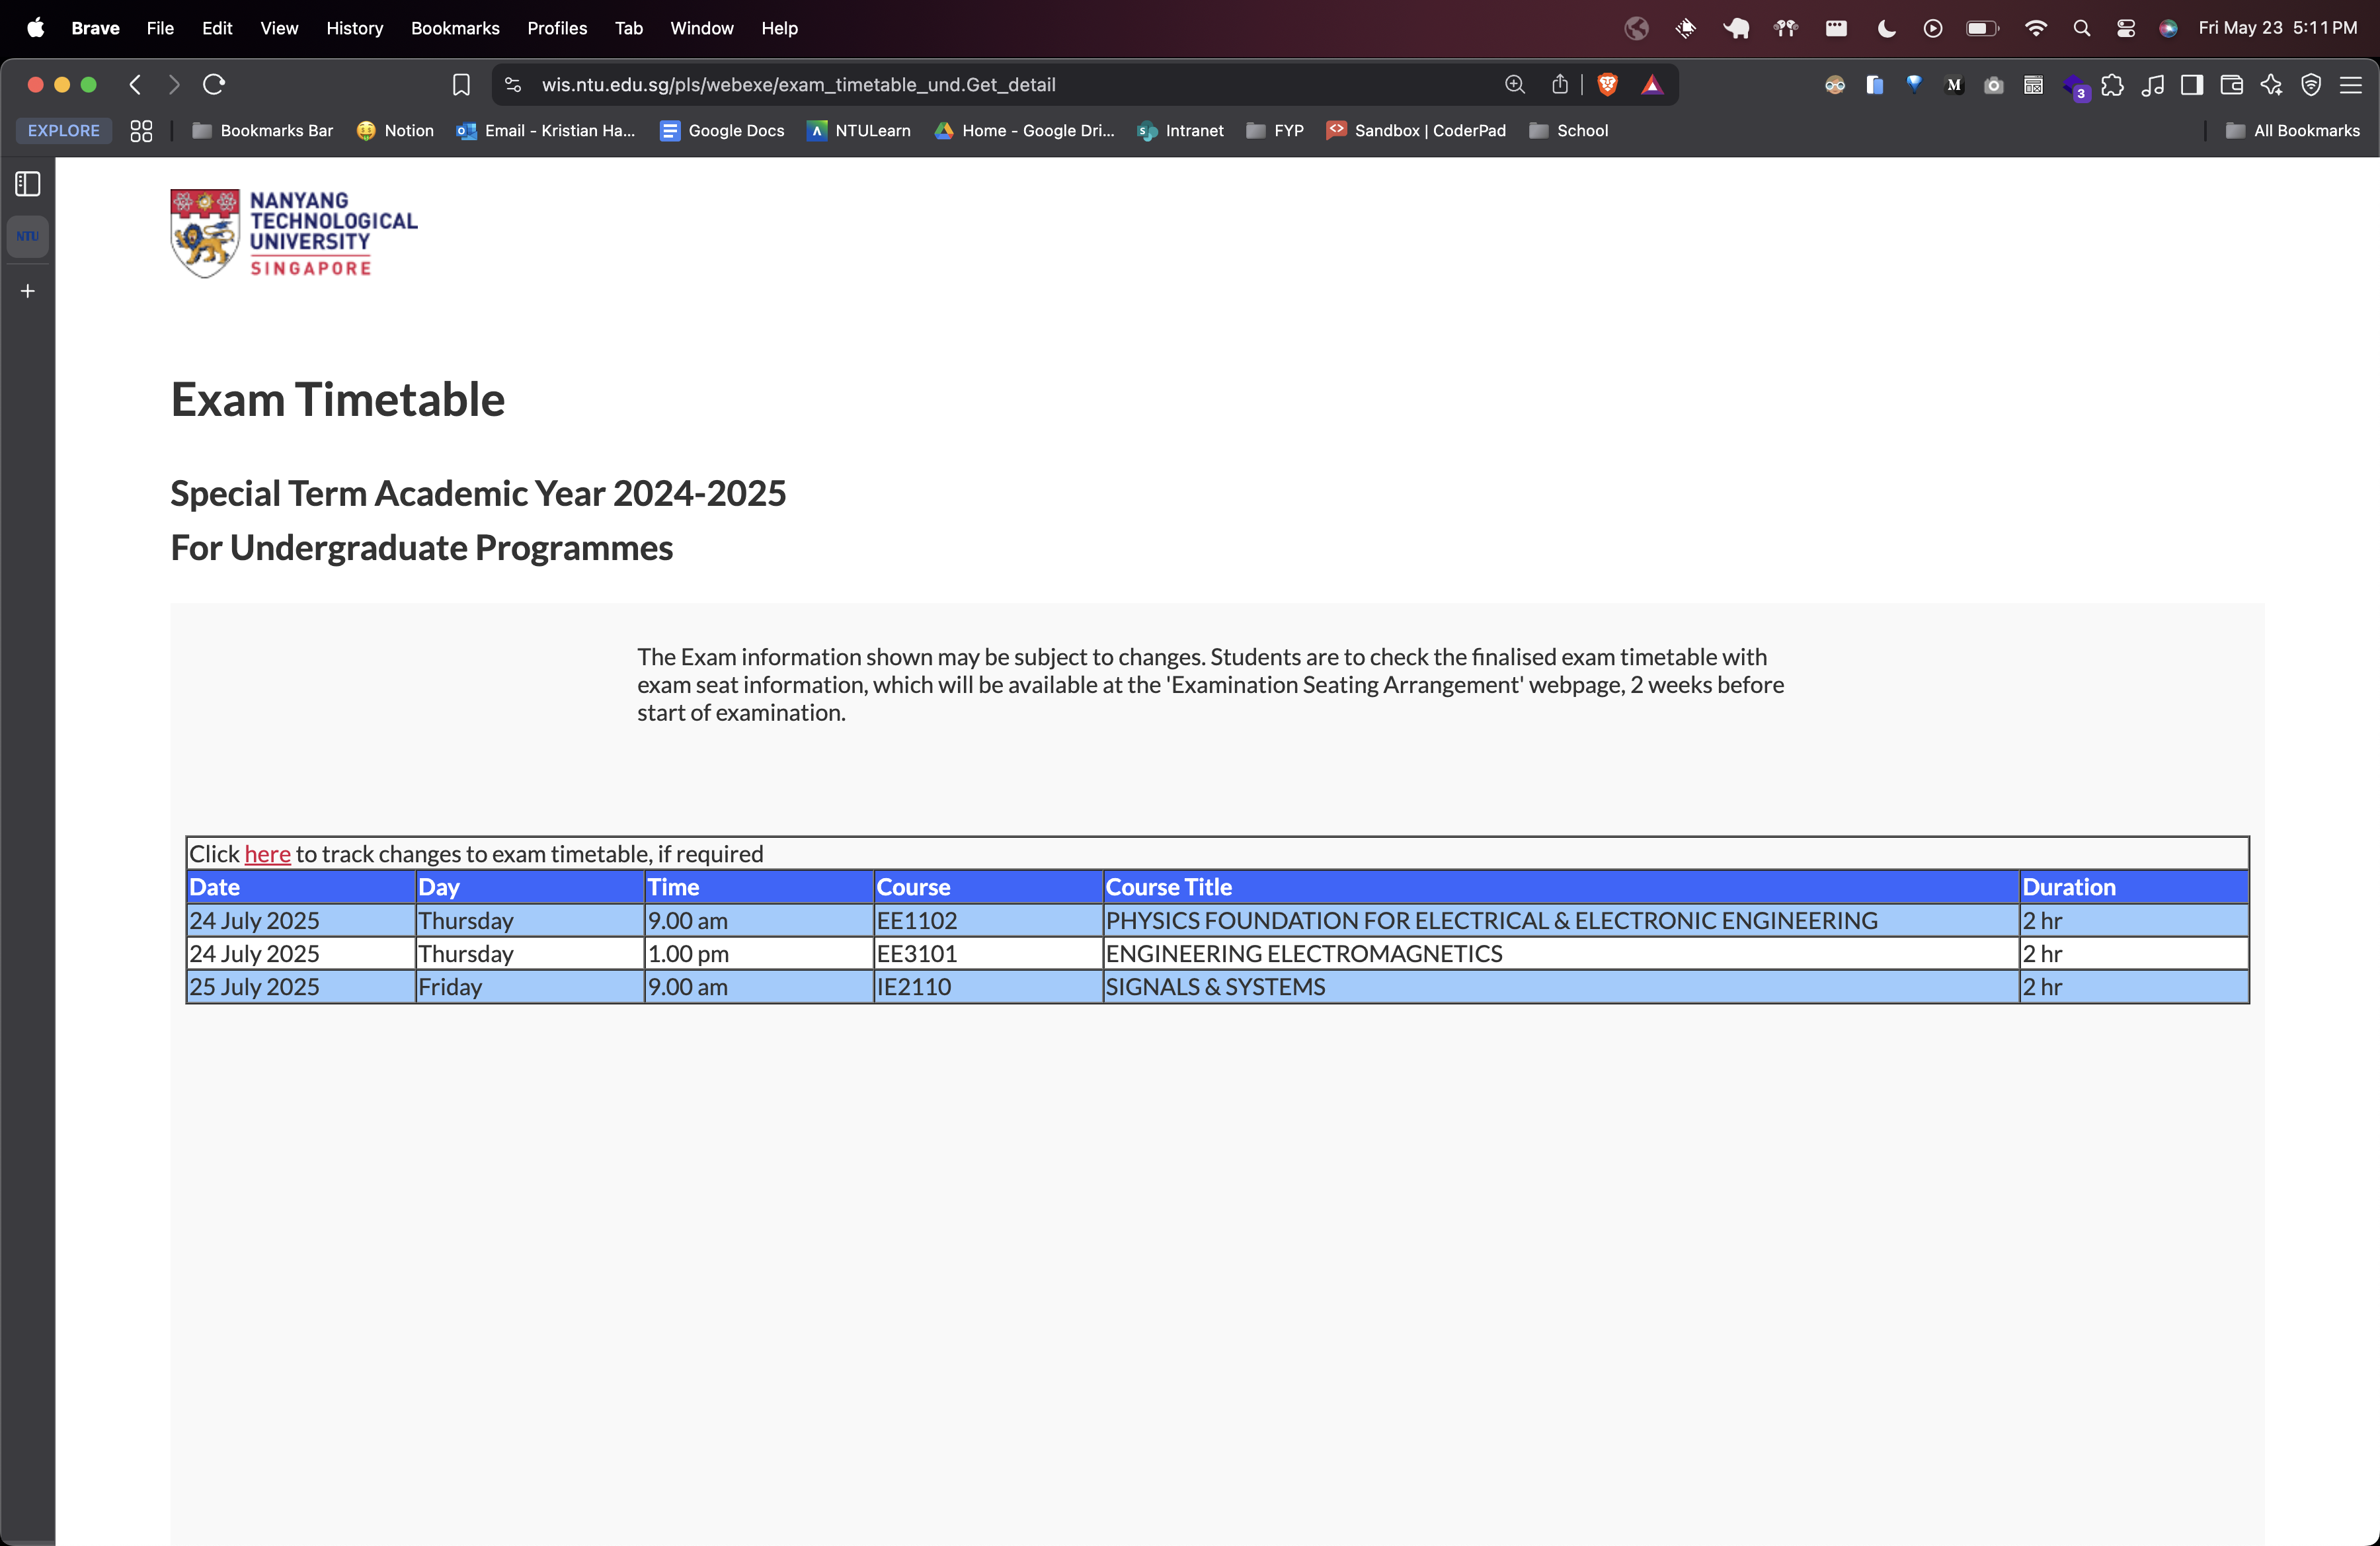
NTU does not offer an official API for course data. Instead, we relied on the publicly accessible static HTML pages that contain information like course details, schedules, and exam timetables.
We wrote scrapers to extract and convert this raw HTML into structured data, which we could then use in our frontend. The pipeline is simple but effective — and relatively easy to update each semester, assuming the HTML structure remains stable. That said, we’re definitely crossing our fingers that NTU doesn’t overhaul the format anytime soon, or we’ll be back to rewriting parsers from scratch.
Front End
We built the frontend using Next.js, with shadcn/ui Tailwind CSS for styling and Zustand for state management. Everything was somewhat straightforward, except for some of components that we will talk about in the following sections.
Timetable
The timetable component is the most intricate UI in NTUMods.org. It handles course rendering by day and time, supports index switching seamlessly by showing alternative classes directly, and is fully responsive.
Implementation Details
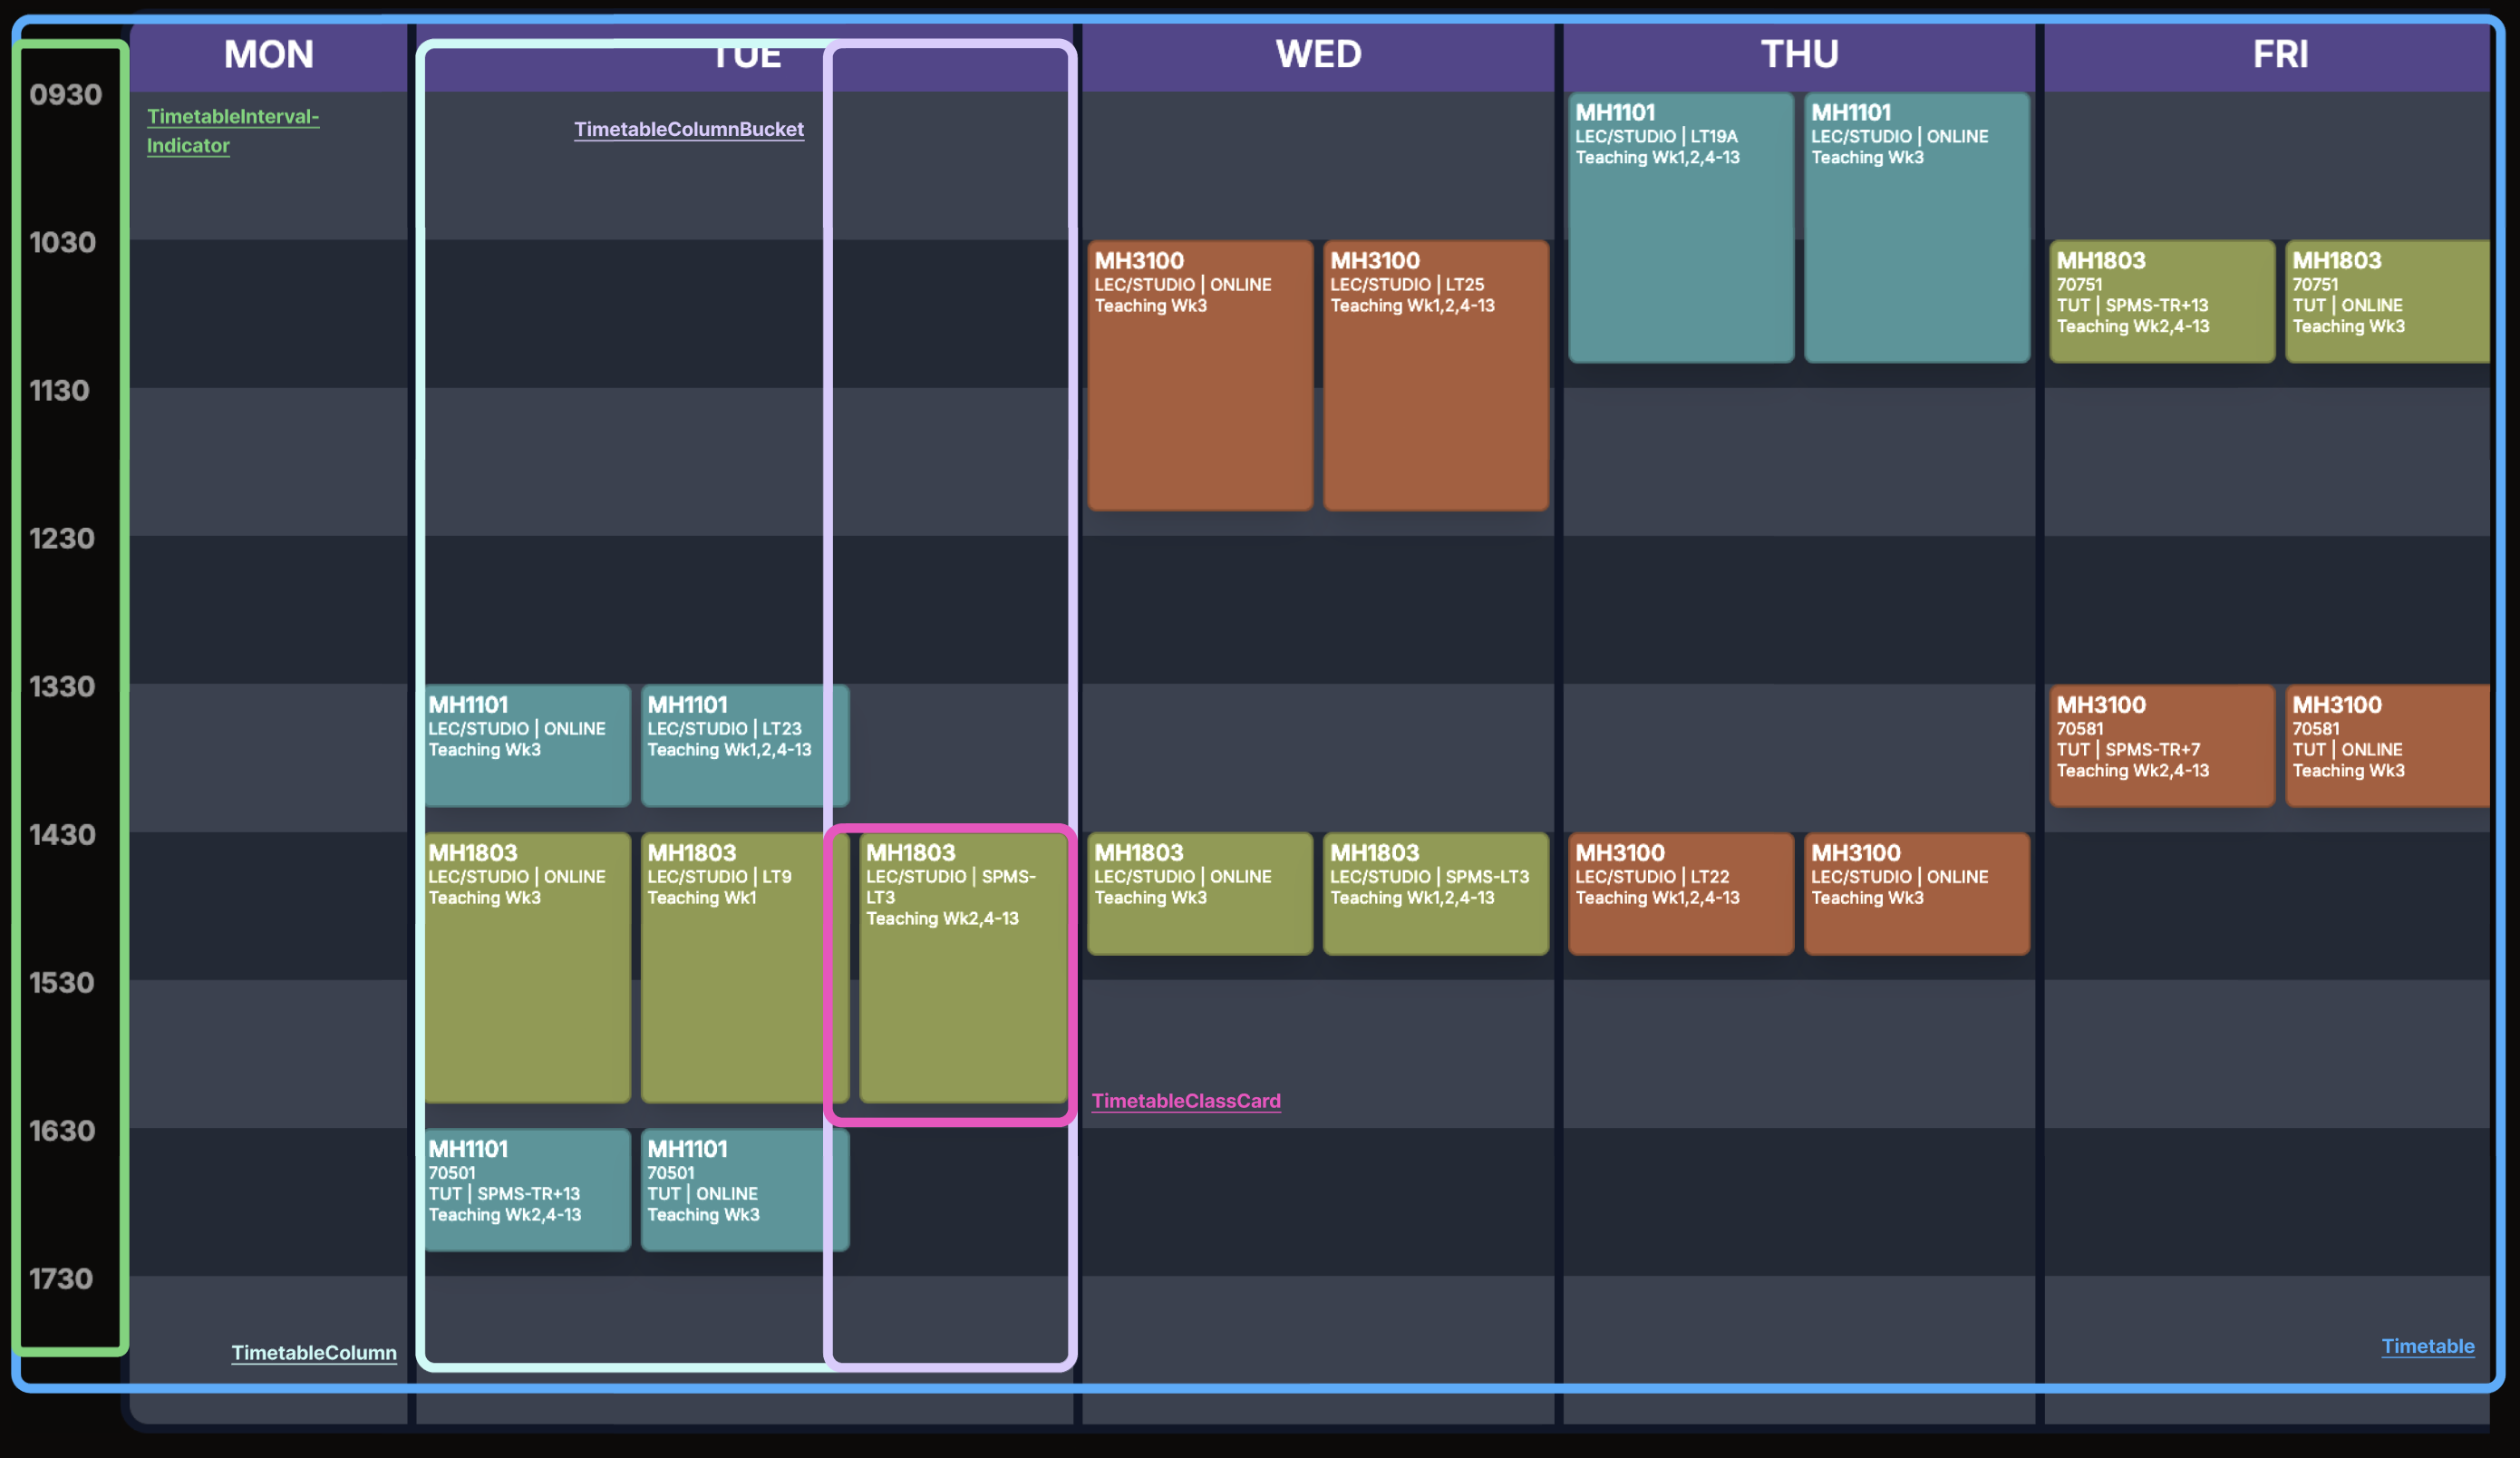
The component can be viewed as the following hierarchy:
Timetable
├── TimetableIntervalIndicator      ← time labels (e.g., 0800, 0900)
└── TimetableColumn (per day)
    ├── Hour Grid (for layout background)
    └── TimetableColumnBucket (non-overlapping group)
        └── TimetableClassCard (individual class box)
To better understand how the timetable is organized internally, here’s a visual breakdown of its component hierarchy — from the root Timetable component down to each individual class card.
We briefly describe what each component does:
-
Timetable.tsx- Maps raw course data into
ClassMapByDay. - Filters selected or toggled indexes.
- Uses
useTimeAdjustment()to get visible hours. - Renders 6 weekday columns dynamically.
- Maps raw course data into
-
TimetableColumn.tsx- Sorts classes into non-overlapping buckets via
getCourseBuckets(). - Each bucket is rendered side-by-side to represent class overlaps.
- Dynamically adjusts width using
getWidthByNumberOfBuckets().
- Sorts classes into non-overlapping buckets via
-
TimetableColumnBucket.tsx- Receives a single bucket (i.e. non-overlapping group of classes) and renders it within a timetable column.
- Internally maps each item to a
TimetableClassCard, stacking them vertically by their time. - Positioned within a flex layout, so multiple buckets render side-by-side without overlap.
-
TimetableClassCard.tsx- Calculates class box
topandheightusing start/end time. - Supports clicking to toggle/select alternative indexes.
- Adapts style to theme, user settings, and class type (e.g., common vs index-based).
- Calculates class box
Interactive Tutorial Mode
To help first-time users quickly understand how to use the timetable planner and discover “hidden” features, we built an interactive tutorial mode.
Implementation Details
The tutorial is implemented using global state TutorialState
export interface TutorialState {
  isTutorialMode: boolean;
  tutorialStep: number;
  isFirstTimer: boolean;
  setIsFirstTimer: (isFirstTimer: boolean) => void;
  setTutorialStep: (tutorialStep: number) => void;
  setIsTutorialMode: (isTutorialMode: boolean) => void;
  goNextStep: () => void;
  goPreviousStep: () => void;
  quitTutorial: () => void;
  startTutorial: () => void;
}
This state allows us to control the tutorial flow across the app — such as entering or exiting tutorial mode, moving between steps, and customizing the experience for new users. The following are the complete interactions between different components:
- A “Tutorial” button (
TimetableTutorialButton.tsx) triggersstartTutorial(). - The entire app is wrapped in a
TutorialWrapper, which overlays a translucent backdrop and a close (X) button. - Key components like the timetable and course list use
TutorialHighlightedComponentWrapperto:- Display contextual label
- Highlight components step-by-step using
stepOrders - Allow dismissing the tutorial with
quitTutorial()
This code snippet shows how we simply implement the tutorial flow:
<TutorialHighlightedComponentWrapper
  stepOrders={[1, 2]}
  messages={[
    "Click any tutorial class to show alternative classes",
    "Click one of those alternatives to select that class",
  ]}
  messagesClassName={["top-0 left-0 font-bold", "top-0 font-bold"]}
>
  <Timetable />
</TutorialHighlightedComponentWrapper>
And it corresponds to this step:
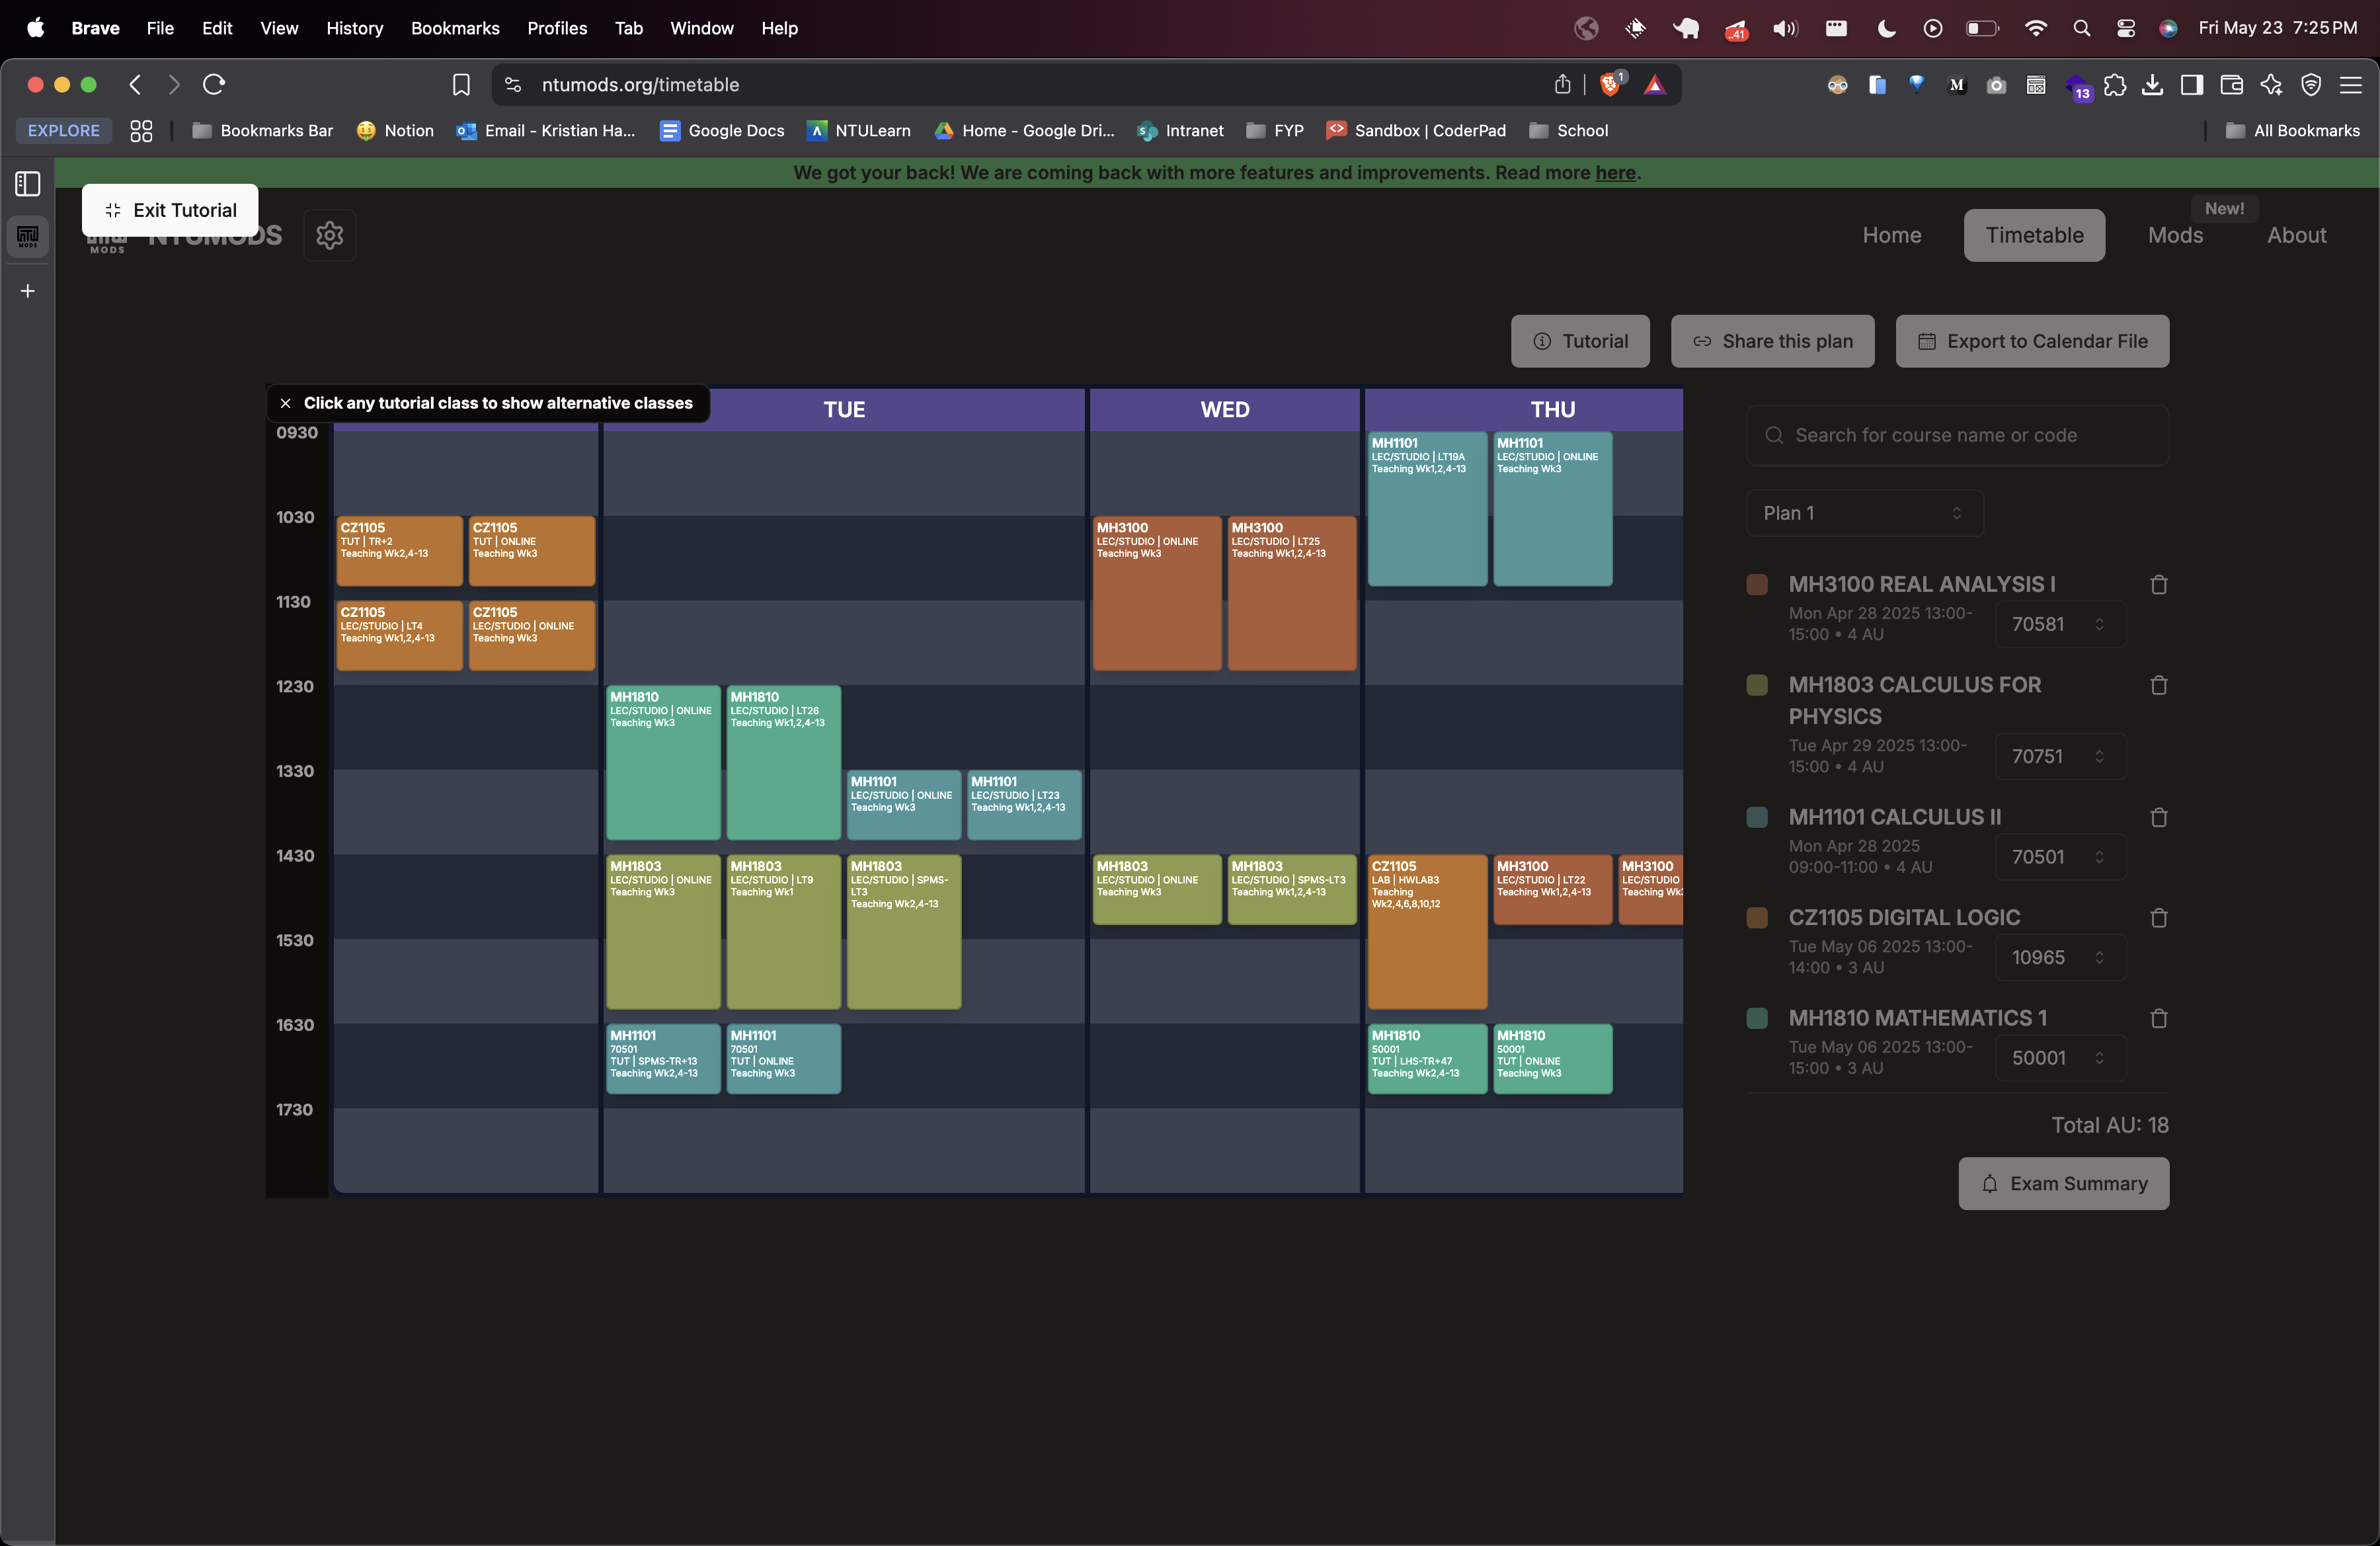
Each wrapper checks tutorialStep and only renders the message if it matches the active step.
Conclusion
NTUMods.org started as a simple idea to improve course planning — and grew into a full-featured tool shaped by real student needs. It taught us how to build fast, adapt quickly, and prioritize experience. There’s more to come, but we’re glad it’s already making semester planning a little easier. We hope to a more improved version of NTUMods.